Finding the periscope lens: The search for the lowest shot
Long before I had the idea of building a series around Bandai TECS models, I knew I was headed for one major complication; namely, getting low enough onto the set to frame shots of the locomotives in a realistic manner.
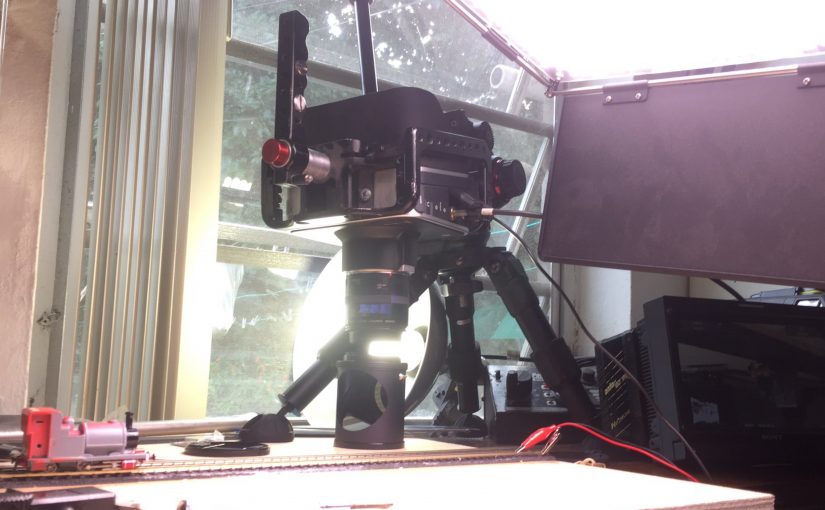
My Blackmagic Pocket Cinema Camera – with its Micro 4/3-sized sensor and lenses, would have probably done the job adequately; though my dislike of the default color LUTs and an obsession with shooting in 4K made my existing Blackmagic 4K Production Camera the better choice as far as the sensor and picture were concerned. The Production Camera is no small beast though, and it has the ergonomics of a giant mutant toaster when plopped into the land of 009.
Equally problematic is the fact that the larger Super 35 sensor (in comparison to the Pocket’s Super 16) of the Production Camera affects depth of field (DOF). While the average filmmaker tends to seek the relatively shallow depth of field gained with the S35 sensor size, I’m looking for a deeper depth of field. The smaller the model, the more advantageous a deeper depth of field becomes, as the deeper DOF tends to replicate the relative DOF of the real thing – and thus, make the object on screen appear to be much larger than it is. (DOF is also affected by focal length, but one thing at a time here). Then again, one doesn’t want to go too far off in the deep DOF range either, lest the footage look like it was shot with a cheap camcorder. The DOF associated with Super 16mm film and sensor sizes is about right.
Believe it or not though, depth of field was not really given that much concern during the classic model era of Thomas. David Mitton and his camera operators didn’t make an extraordinary effort to hide it with the Gauge 1 sets and models, as the models looked quite realistic even with the DOF of 35mm film.
What really sold the realism of the original series was the framing of most character dialog scenes (or locomotive/train run-bys) at human (a 1:32nd-scale human, that is) and character/locomotive eye-level. And since mobility around the layouts was essential, the Mitchell 35mm film cameras on the show were often suspended on rail systems over the sets, necessitating the now well-known periscope lens used for both Thomas and TUGS.
In this day and age of miniaturization, getting a video camera that would sit on a Gauge 1 set – and be low enough to frame the shot like the original periscope lens – isn’t a problem. But I’m working with the Bandai models, and though bigger than 009, they’re still around 1:64 or thereabouts (probably a bit larger), so I’m pushing the envelope of practicality here.
Equally problematic is that the Canon EF lenses used by the Blackmagic are too large to begin with even if you lie them directly on the set, limiting all shots to be taken at the edge of the set. Not really practical, even with stacked teleconverters.
I weighed my options, and came up with the following possibilities:
- Use my existing Blackmagic 4K Production Camera with a wide angle lens stopped down to give deeper DOF. This would only solve the DOF issue, not the problem of where to place the camera.
- Use the Blackmagic 4K with a 90-degree spy mirror attachment to get the camera body out of the set’s way. These mirrors are usually limited to 58mm lens threads, so it only works with my Canon 50mm macro, and it’s not large enough to cover the image circle of wide angle lenses. Plus, any dirt on the mirror will be reflected on the recorded image.
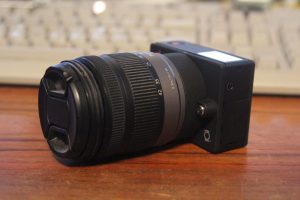
- Get a Z-Camera E-1 – a tiny camera just a touch larger than a GoPro, with a Micro 4/3rds lens mount. Capable of 4K and slow motion, but only 8-bit color, unlike the BMPC4K’s cinematic 10-bit.
- Try a Panasonic GH4 or Blackmagic Studio Camera 4K with a Ninja Shogun external recorder for 10-bit 4K. The Blackmagic, in particular, sits as low as the E-1. This is also most expensive option of anything here.
- Find a real cinema periscope lens that uses small C-mount lenses at the layout end (which lets the mirror box sit really low to the ground) and steps up the image circle size through an optical relay, so the image is enlarged so that it fills the entire S35-sized sensor on the BMPC4K. Also, since the image is being relayed from a C-mount lens, I should get the deeper depth of field of the smaller lens, via the relay’s teleconverter-like properties (which steps the image up in size to cover the smaller sensor).

Given the relative inexpensive cost of #1 through #3, I tried them all. #1 didn’t solve anything, #2 was interesting, but DOF issues with the 50mm made it impractical.
I did, indeed, buy a Z-Camera from Amazon – and returned it the next day. It turned out to be a big disappointment, rendering very bright and overly sharpened images reminiscent of a cheap camcorder. I know 8-bit has its limitations, but the firmware wasn’t even trying to balance sharpness well (even after a firmware update, which took 4 hours, as the manufacturer’s recommended method of update via Bluetooth did NOT work, and after much frustration, finally found out that it could be updated via the Micro SD card as well). It’s a pity, as it really seems as if this camera could do a bit better (though the sensor’s physical properties may limit it from doing anything really nice).
After seriously considering the expense of the Blackmagic Studio Camera paired with the Shogun or the Panasonic GH4 similarly paired (or the possibility of using the upcoming GH5), I realized my expense would equal that of an actual periscope lens that could be fitted onto the Blackmagic Production Camera without much effort.
So that is what I set out to find. And I did – to be covered in the next post.